File attachment field properties
The properties for this field type are:
Label
Enter a name for this field. This name displays on data-entry forms and as column headings in reports.
Type
Click Change Type to change the field type.
Some field types (List-User, Multi-select Text, and File Attachment, for example) may not be changed. The Change Type link will not be present if this is the case.
Related Topic:
Required
Select Must be filled in to require users to enter a value in this field. A red asterisk (*) beside a field in Add and Edit forms indicates that this value has been set for the field.
Revisions
|
Select this option... |
To... |
|---|---|
|
Keep all revisions |
Store every revision made to a document in Quickbase. Maximum number of revisions for a file attached to a table = 100. |
|
Keep the last n |
Enter the number of document revisions that you want Quickbase to store in each attachment field. |
|
Allow users to make older versions the current version |
Let users view previous uploads to this attachment field. Users who can view the revision history can restore a previous version of a document and make it the current version. |
Link Behavior
Select Use a new browser window for file attachments to open a file attachment in a new browser window when a user clicks the link to view it.
Allow Open Access
If you'd like to send a link to a file stored in this field to someone who isn't a Quickbase user, select Allow access to this file attachment from a Quickbase link without signing in.
Warning: Any link to a file stored in this field will allow open access to the file for anyone who clicks the link as long as this checkbox is selected. Do not use this option for files that contain sensitive or confidential data.
Display
You can set the following display options for your file attachments.
Link Text
You can type in text to display as the link to your file attachment. By default, the file name will display.
Images
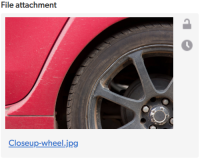
Select Show .jpg, .png, and .gif files as images in forms to display a thumbnail image instead of the file name. Users can select the image to view it full size.

Value Display
These properties apply when the field appears in table and timeline reports.
|
Select one or more options... |
To... |
|---|---|
|
Display in bold |
Display the data in bold. |
|
Display without wrapping |
Prevent the data from being broken into multiple lines. |
Permissions
To set the permissions:
-
Click Restrict access by role to limit access to the data in this field.
When selected, the Role and Permission list appears.
-
Select either None, View, or Modify for each role.
Note: This property is not available to accounts on the Quickbase Essential plan.
Related Topic:
Searchable
Select to allow the field to be included when searching or filtering the table.
Reportable
To use this field in reports:
-
Select Add this field to all new reports to display this field as a column when users create but don't customize reports.
When selected, automatically selects The field may be used in reports option.
-
Select The field may be used in reports to use this field in reports.
If you want the field to be a default column, you must select this option.
Related Topics:
Shared values
To make entries in this field available as choices in another field:
-
Select Values from this field may be a source for dropdown lists in other apps, then click Add App.
-
Select an application, then click OK.
Related Topic:
Field help text
If you want to provide help text in association with this field, enter it in the text box. This text will display via the information (![]() ) icon next to the field.
) icon next to the field.
