Using a sandbox
New sandbox: This topic covers the new sandbox feature released in December 2019.
You can use a sandbox to collaborate, plan, build, test, and release Quickbase apps.
Note: This feature is available for specific plans. Check the Quickbase Pricing page for a comparison.
To learn about enabling the sandbox feature for an app, read Enabling and disabling a sandbox.
Creating a sandbox
Once the sandbox features are enabled for an app, you can create a new sandbox.
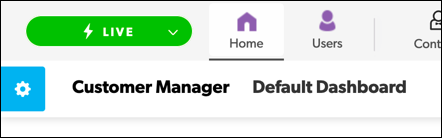
- From the My Apps page, open an app that has sandbox enabled. The Live button displays at the top left of the page, indicating you’re currently using the live app. Click Live to show the sandboxes menu.
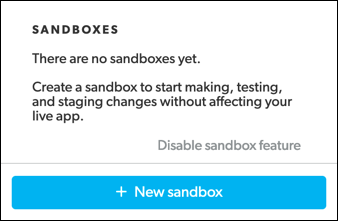
- Click + New sandbox.
- Enter the name of the new sandbox and select whether you want to copy any records into the sandbox.
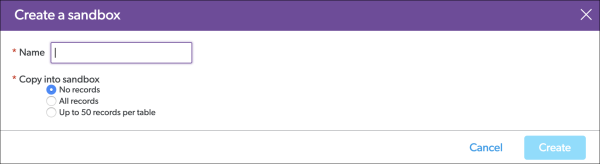
- Select Create to have Quickbase automatically open the new sandbox app. The new sandbox name appears in the button indicating that you are now editing the app in the sandbox instead of making changes to the live app.

You can now safely make and test changes to the sandbox version of the app without affecting the live app.
Sandbox users and access
When the sandbox is created, all the users and groups that appear in the live app’s Users tab are copied to the sandbox’s Users tab. The app manager, and each user and group with administrative privileges, retains their access permissions in the sandbox.
All other users and groups will have their roles set to “none” in the sandbox, but you can change this access to allow others to see changes in the sandbox. You can also invite new users to the sandbox. Changing the user access to the sandbox itself are not tracked as changes and are not published with sandbox updates. In other words, access to the sandbox and access to the live app are treated separately.
Reviewing and publishing changes from a sandbox
Before publishing the changes you made in a sandbox to the live app, you can review them.
Reviewing changes
Click the sandbox button, then click the Review & publish button to display a list of changes that were made to the app in the sandbox.
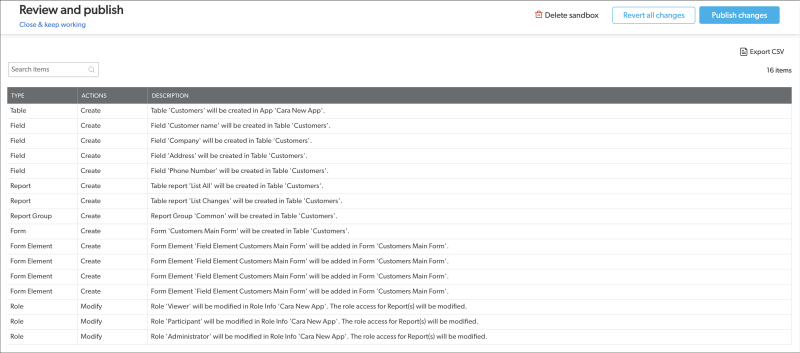
The list displays any schema (app structure) changes you made. Based on your review of the changes made to the app, you can perform any of the following tasks:
-
Close the review and continue to make changes
-
Export the list of sandbox changes to a spreadsheet
-
Revert all changes made in the sandbox
-
Publish changes to the live app
-
Delete the sandbox
Note: You must either accept or reject all of the changes you made in a sandbox. You cannot selectively publish change items.
Closing the sandbox review
To close the review and continue to make changes in the sandbox, select Close & keep working at the top left of the page. You return to the app home page in the sandbox.
Exporting sandbox changes to a spreadsheet
To export the list of sandbox changes to a spreadsheet, select Export CSV at the top right of the page.
Reverting all changes made in the sandbox
Before publishing any changes to the live app, you can decide to revert all changes.
-
Select the Revert all changes button at the top right of the page. A confirmation dialog appears.
-
In the dialog, select Revert all changes to delete any unpublished changes that were made to the app in the sandbox without publishing them to live app. The schema returns to the same schema as the live app. Based on the amount of schema changes, a spinning indicator may display as the system reverts the changes.
Note: You cannot undo this action.
Publishing changes to the live app
Select Publish changes at the top right of the page. A publish confirmation dialog displays where you perform the following tasks:
-
Select Publish to confirm your changes and publish to the live app while retaining the sandbox. Based on the amount of schema changes, a spinning indicator may display as the system publishes the changes to the live app. You are automatically redirected to your live app when your changes are published successfully. The sandbox remains in place and can be used to track the next set of changes to your app.
-
Select Publish & delete sandbox to publish your changes to the live app and delete the sandbox. You are automatically redirected to your live app when your changes are published successfully.
-
Select Cancel to return to the sandbox and make additional changes.
Deleting the sandbox
-
Select Delete sandbox at the top of the page. A confirmation dialog displays.
-
Select Delete to delete the sandbox, including all of its unpublished changes. Based on the amount of schema changes, a spinning indicator may display as the system deletes the sandbox.
Note: You cannot undo this action.
